
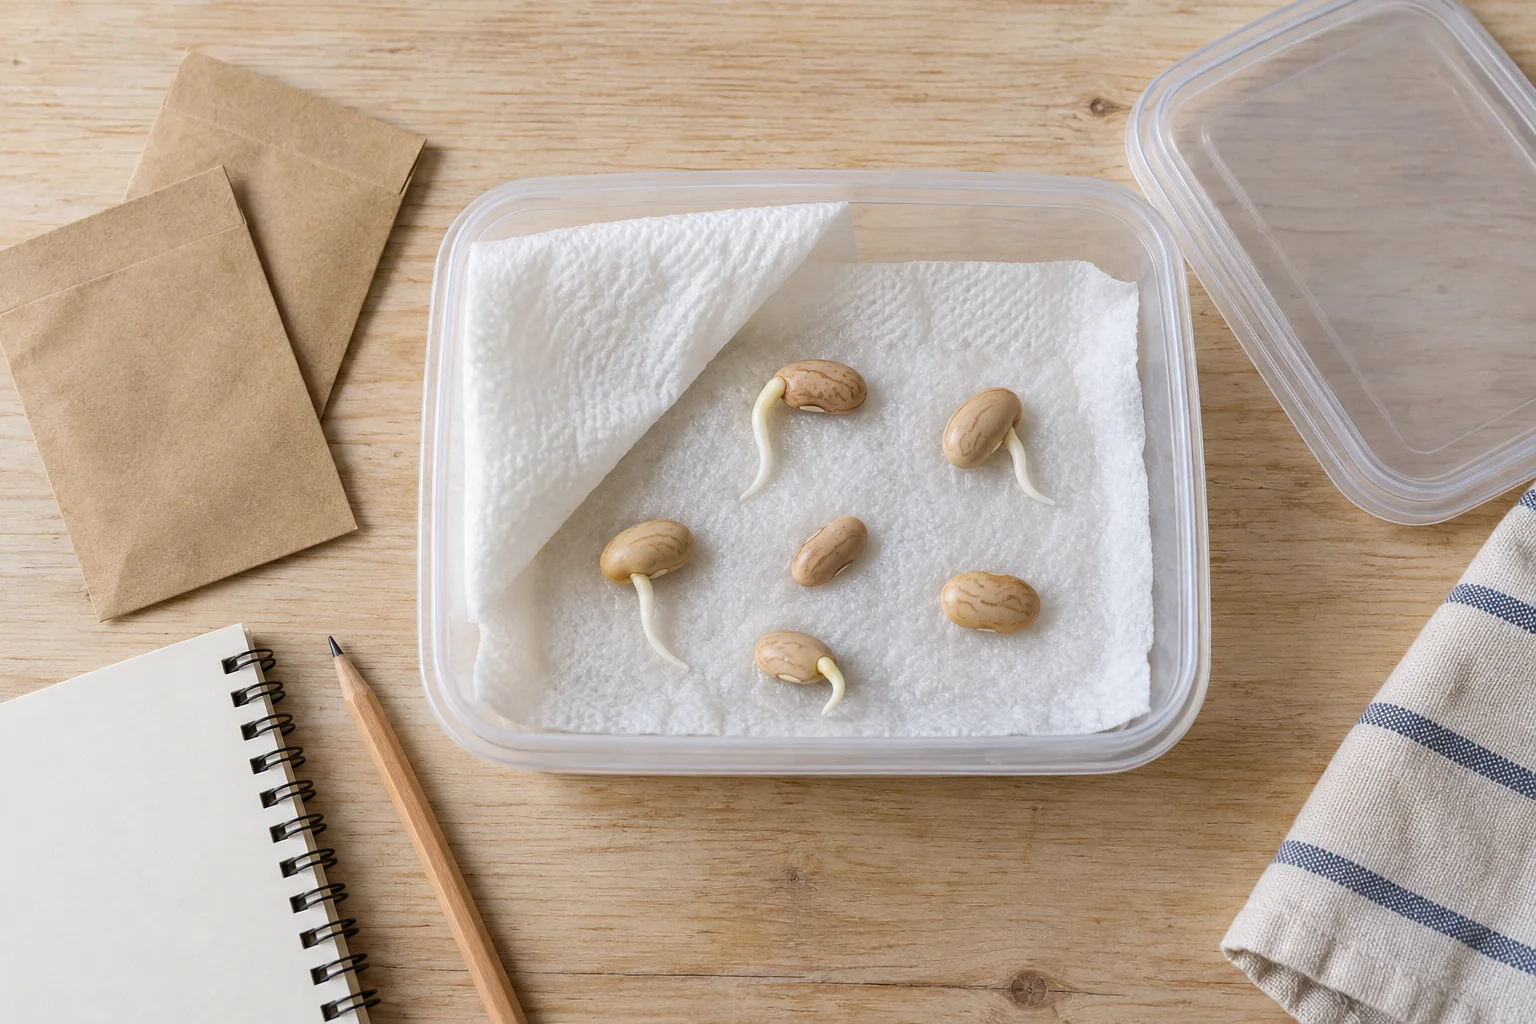
A half-used seed packet does not answer the question that matters: will enough of these seeds grow for the few pots you have planned? A small germination check gives you evidence before you reserve tray space. Use it to make a sow-or-replace decision, not to predict an exact harvest.
Start with the packet and the calendar
Keep each crop, variety and packet separate. Note the packed-for year, any known storage history, and the germination instructions. A packet left in a hot shed and one kept cool should not be treated as identical simply because their dates match. Illinois Extension explains that storage conditions and crop species affect seed longevity.
In a cold-winter region, an October check may help you sort supplies, but a result now is not a guarantee for spring after more storage. Test near the sowing decision as well when the seed’s condition is uncertain. In a mild-winter region, the same method may support an upcoming cool-season planting. Neither result creates a suitable outdoor planting window; use the local season-planning approach.
Make one labeled sample
The following is a home screening method based on Illinois’s paper-towel germination check. It is not a certified seed-laboratory test. For valuable seed with only a few seeds left, consider whether using ten for a test leaves enough for your actual project.
- Moisten a paper towel without leaving it dripping. Space ten seeds on it; use a larger counted sample if you can spare it.
- Fold the towel over the seeds and put it in a sealable bag or container to retain moisture. Label crop, variety, sample count and start date.
- Keep the sample at a suitable germination temperature. Around 70°F is Illinois’s general starting point, but the packet’s crop-specific instructions take priority.
- Check periodically against the packet’s expected germination time. Record visible sprouting and the final count; do not declare slow seed dead after an arbitrary three days.
If nothing sprouts, check that the sample stayed moist and that the crop did not require a special treatment. A failed setup cannot establish that every seed in the packet is dead. Record “test conditions uncertain” when appropriate and repeat before drawing a strong conclusion.
Calculate the result without promising plants
Sample germination = sprouted seeds ÷ seeds tested × 100. Eight sprouted seeds out of ten give 80%. Each seed in that small sample changes the result by ten percentage points. Write “8 of 10” alongside the percentage so you do not lose that context.
| Example result | What the arithmetic says | Planning implication |
|---|---|---|
| 8 of 10 | 80% of this sample sprouted. | Useful evidence, but not a promise that 80% of the remaining packet will become strong transplants. |
| 14 of 20 | 70% of this sample sprouted. | Keep the larger denominator in the record; this is still a sample under your test conditions. |
| 0 of 10 | No observed germination in this test. | Check time, moisture and crop requirements before treating the packet as unusable. |
If you need six seedlings and use an observed 80% as a planning assumption, 6 ÷ 0.80 = 7.5, rounded up to eight seeds. That is a rough expected count, not a reliability guarantee: it allows nothing for weak seedlings, damage or later losses. Adding 20% to six would give only 7.2 before rounding; the general calculation divides by the germination fraction, rather than subtracting a percentage from 100 and calling it a planting rule.
Choose a response that fits a small garden
For a flexible experiment, you may accept uncertainty and reserve a few spare positions. For a time-sensitive planting with only one useful growing window, fresh seed or an appropriate transplant may be the better use of space. A low result is not a reason to empty the packet into a small pot and leave it crowded. Final crop spacing still applies.
Write one decision beside the count: use for the planned batch, repeat under better conditions, keep for a flexible experiment, or replace. Then update the seed-starting tray plan. Germination is only the first step; count usable plants again before assigning their final containers.
Return the remaining seed to dry storage
Minnesota Extension recommends cool storage in an airtight container, with a refrigerator as an option. Keep the original labeled packets together in the container and keep test materials separate from the dry seed you are saving. Do not return damp test seeds to a dry packet. Record where the packet is stored so next season’s decision begins with more than its age.
The image shows the idea of a towel check, not the sample behind the numerical examples. Keep your own dated photographs if you want a record you can compare later.
Your next steps
0 of 5 steps checked · Saved on this device
Sources & further reading
Extension resources support the growing principles in this guide. Planning examples apply them to small container gardens. Local conditions and variety instructions take priority.
Prepared with AI assistance; this is research-based guidance, not a personal growing trial. Editorial policy · Suggest a correction